Construction of a Stihl Chainsaw Chain
Construction of a Stihl Chainsaw Chain
Buy Stihl Chainsaw Spare Parts and Accessories Here »
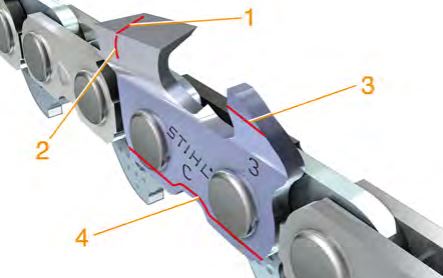
Stihl chainsaw chains are three-link chains assembled in a consistent pattern. The shape of the cutters and the dimensions of the individual links may vary.
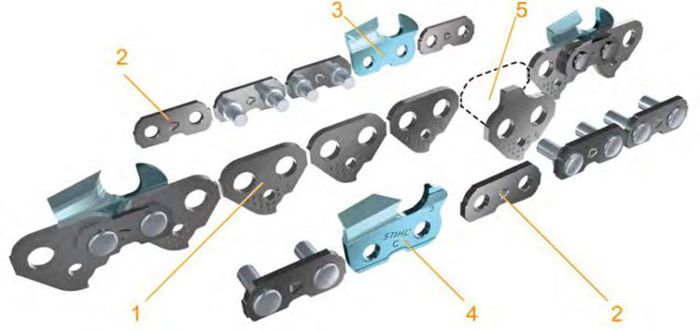
- The saw chain consists of the drive links
- The tie straps
- The left-hand cutters
- The right-hand cutters
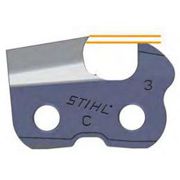
- Low kickback saw chains feature a humped drive link
Low kickback chains have a humped drive link, identified by the digit 3 in their designation, for example: 36 RS3.
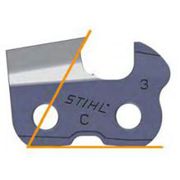
Cutters
For optimal cutting performance, the side and top plate of the cutting edges must maintain a specific angle relative to each other. This angle is achieved automatically when the correct sharpening angles are followed.
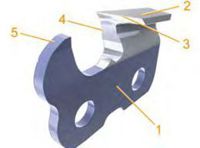
- The cutter consists of the basic tooth body
- The top plate
- The top plate cutting edge
- Side plate cutting edge
- Depth gauge
Method of Operation

The cutters operate on the chipper tooth principle, removing chips from the wood. The top plate cutting edge lifts the chip off the bottom of the cut, while the side plate cutting edge separates the chip from the wall of the cut.
The depth gauge setting determines how deep the cutter enters the wood and the thickness of the chip removed.
The difference in height between the top of the depth gauge and the leading edge of the top plate is known as the depth gauge setting.
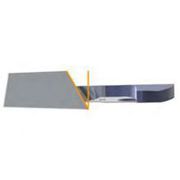 Filing Angle
 Top Plate Cutting Angle
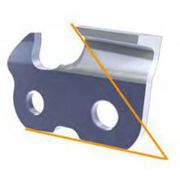
 Side Plate Angle
To ensure the chain runs smoothly, all cutters must be the same length and sharpened to the specified angle.
Service and Wear Markings
Most chainsaw chains feature service and wear markings to simplify resharpening and monitor wear. Follow these steps to keep track:
- Filing angle: Marking for the correct filing angle of the top plate cutting edge and the minimum cutter length. Replace the chain if this marking is reached during resharpening.
- Side plate angle: Marking for the correct angle of the side plate and the minimum cutter length.
- Depth Gauge: Marking for the correct angle of the depth gauge and checking wear. The contour of the depth gauge must be filed back parallel to this marking.
- Toe and heel wear: Reference marking for wear on the bottom of the cutter (running faces). Uniform wear parallel to the marking indicates normal chain wear.