How to Replace the Crankshaft on a Stihl TS410 Disc Cutter
In this video, we show you how to change a crankshaft on a Stihl TS410.
Health & Safety Warning - Please ensure that you have safely prepared the machine and workspace. If you are unsure about any aspect of the task please seek professional advice.
Transcript
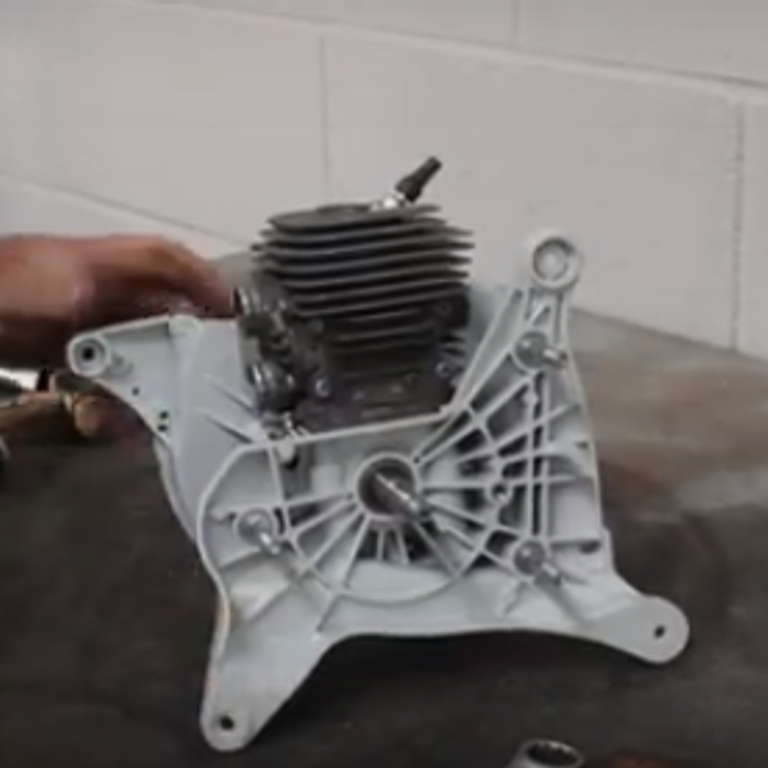
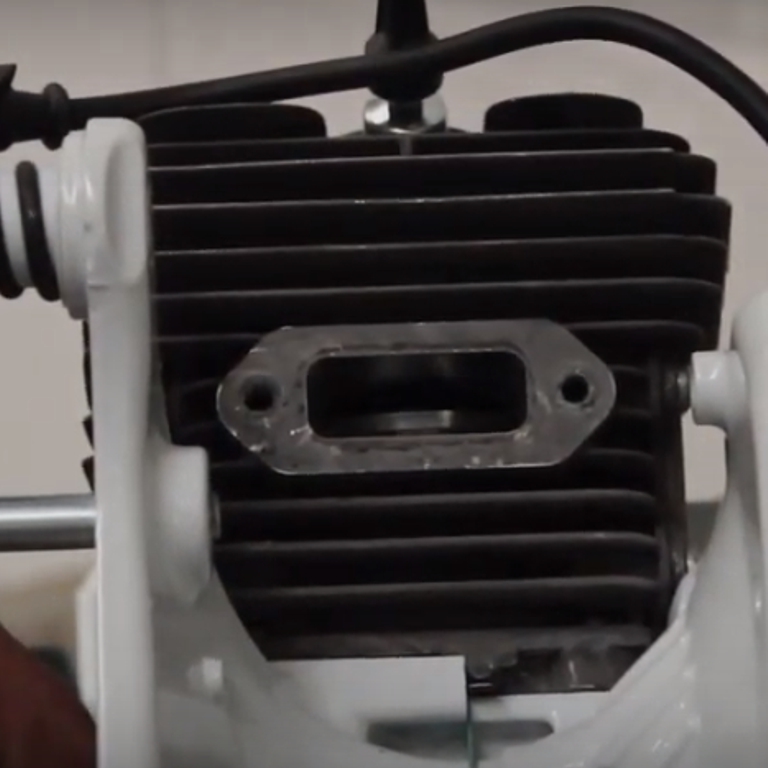
To do this you need to get the machine down to a short engine. We have linked our video on how to do this in the description below. Once that's done you can continue with this tutorial. Now using a 13mm spanner loosen the decompression valve. Then return to completely remove by screwing it off by hand. Turn the short engine upside down. Remove the four screws based in the crankcase to detach the cylinder from the machine using a torx spanner. When doing this, take note of which way the cylinder is facing as this will have to be placed back in the same way. This will then show the cylinder gasket. Remove the gasket by hand. As you're taking it off, make a note of how the gasket is placed. Once the gasket is off, use a pair of pliers and remove the spring which sits inside the piston. Now that is removed, use a tool to help push out the piston pin, carefully free this from the machine. . Then finally remove the needle bearing which sits within the crank, make sure you don't lose these components. To split the crankcase you will have to unscrew the four screws which hold it together, you can do this with a torx spanner. To protect the thread put a nut on the end of the crankshaft. Then using a copper hammer strike the crankshaft a few times to split the crank casing. To remove the crankshaft completely you will need to strike it from the other side. Once again place a nut on the end of the crankshaft to protect the thread and strike it with a copper hammer. While you've got the crankcase apart you can remove the gasket. Before putting your new crankshaft on it's important to note the shorter side of the crankshaft has to be fixed onto the flywheel side, with other being fixed to the clutch side. You should lubricate the bearings and crankshaft to make it easier to fix on. Push the short part of the crankshaft through the flywheel side of the crankcase. Once that's in and secure, screw a nut on the top of the crankshaft to protect the thread. To fix it in the crankcase, strike the shaft the a copper hammer to secure it. To test if it's secure you can make sure the crankshaft is moving smoothly. Before fixing on the other side of the crankcase on, we need to put a new gasket in place. Place the gasket in position, making sure it follows the pattern of the casing. Once in position, push down the other side of the crankcase. Place in each of the screws on the side of the crankcase, and screw in using a torx spanner. You want to make sure each of the screws will go through the corresponding holes which are in the gasket. Once that's in place, you can strike the crankshaft with the copper hammer to fix the two halves of the crankcase together. As they get closer, return to tighten each screw, until they are fixed together. Before fitting the piston, it's good practice to lubricate the crank with some oil. This can help the machine run smoother. Then place the needle bearing through the crankshaft, again lubricate it with some oil. When placing the piston back in position, you need make sure the arrow is pointing towards where the exhaust will be fitted. Place your new piston over the crank and turn the engine on its side. While on its side push the pin through the centre of the piston. Then using the pliers, place the piston spring back into position. Ensure that it's secure and in the correct position. Now place the new cylinder gasket in position. Once in position you are ready to put your new cylinder on the machine. However, before doing this you must ensure the gaps in both of the piston rings are centred around the marks on the piston. As a tip use some oil to lubricate piston before placing the cylinder over it. Make sure the piston rings are in the correct position. Now place the Cylinder on top of the piston, ensuring it is the correct way. The exhaust port should be facing the way the arrow is pointing on the piston. Which is where the exhaust will be seated. Push it down and turn the crank to make it more secure. While holding the cylinder, turn the machine upside down. Now using a torx spanner screw in the four screws to secure the cylinder and piston in place.
Parts
Parts and tools included in the TS410 disc cutter how-to video.
- N/G Crankshaft - 410 220
- N/G Cylinder & Piston Assy - 410 200
- Torx Wrench/Plug Spanner 4224 890 3400